How to install the ADB driver on Windows 10 - Complete Guide

Normally, to install the ADB on your computer, you must go through the following steps:
- Check whether you have already installed the ADB driver on your PC.
- Get the ADB driver file.
- Activate USB Debugging on your Android device.
- Open Device Manager and install the ADB driver.
See the instructions below for more details. Make sure you carefully follow them to get the ADB properly configured.
First Step: Check Whether You have Already Installed the ADB Driver on your PC
The first thing you have to do is check whether your computer already has the ADB driver installed. Just run a test through Chrome to see whether your PC can recognize and communicate with your Android device. To do that, follow the steps below:
- Connect your Android device to your computer using a USB Cable.
- Open Google Chrome.
- Inside the URL bar, type “chrome://inspect” (no quotes), then hit Enter.
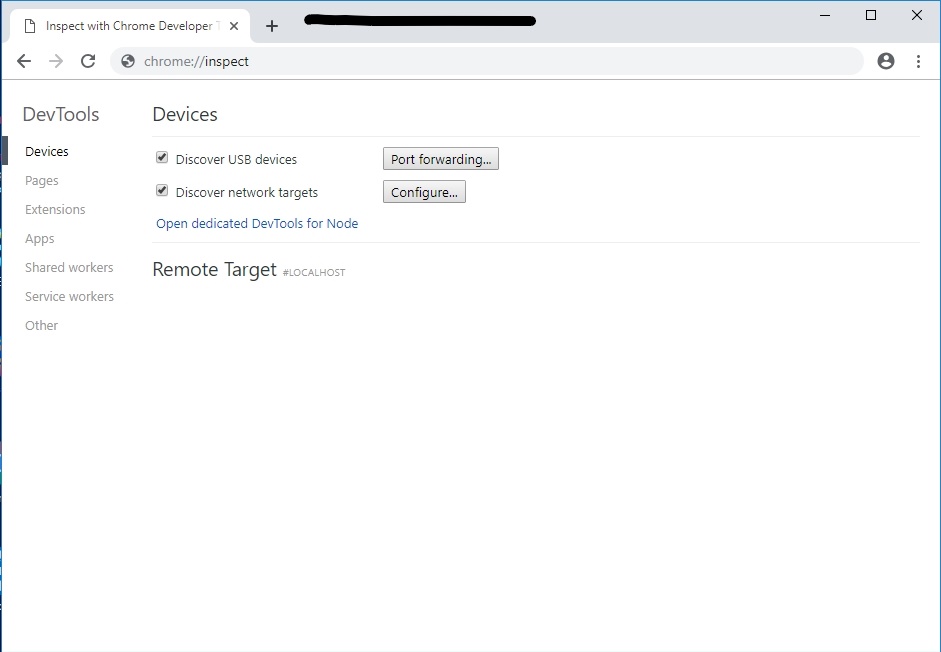
The ADB driver on your PC is not yet installed if the test fails. If you see your Android device name, on the other hand, then it means your computer's ADB driver is already available.
Second Step: Get the ADB Driver File
Of course, you must first get the installation file before you can add the ADB driver to your PC. Usually, the ADB driver file is provided by your Android device manufacturer. Download the installation file using the link below
Third Step: Activate USB Debugging on your Android Device
You must enable USB debugging on your Android device once you have downloaded the ADB driver file. Only when the USB debug function is activated can you enjoy the full potential of ADB. The steps are as follows:
Note: By default, the USB Debugging option is hidden for Android 4.2 and newer versions.
- Open your Android device's settings.
- Scroll down, then tap About Phone or About.
- Tap seven times on the Build number and enable Developer options
- Remember to set the toggle at the top to On.
- Enable USB Debugging.
- Connect yousr Android device with your computer. On your Android device, you will see a message saying, “Allow USB Debugging?” Select the box beside the ‘Always allow from this computer’ option, then tap OK.
Fourth Step: Open Device Manager and Install the ADB Driver
To install the ADB driver, you can open Device Manager. In this article, we will use Google Nexus 7 as all other Android devices are very similar steps. Follow the instructions below once you are ready:
- Connect your Android device with your computer.
- Open the Run dialog box by pressing Windows Key+R on your keyboard.
- Type “devmgmt.msc” (no quotes), then hit Enter. This should bring up Device Manager.
- Look for your Android device.
- Right-click it, then select Properties from the options. If the driver is not installed properly, you will see a yellow warning icon beside your Android device.
- Go to the Driver tab, then click Update Driver.
- A new window will pop up. Select the ‘Browse my computer for driver software’ option.
- Search for the ADB driver file you previously downloaded by clicking Browse.
- Select the box beside Include Subfolders, then click Next. Device Manager will automatically install the ADB driver.
You may ask, "Where can I uninstall the ADB driver if you don't need this functionality?" "The Device Manager allows you to do that. The first four steps must be followed and uninstall device is selected.